How to Use the Wix Bookings App
- Libby Fancher

- Nov 28, 2024
- 6 min read
Updated: 6 days ago
Wix Bookings is a built in scheduling application for your Wix Studio website that lets your your site visitors book and pay for services directly from your site.
This guide will help you navigate the key settings and most commonly used features of Wix Bookings which can be managed directly from your Wix Dashboard.
Table of Contents

How to Edit an Existing Bookings Service with Wix Bookings
From the left hand menu on your site Dashboard, select Catalogue then Bookings Services
Hover over over the product you want to update and select Edit.

The service will open on a new page where you can adjust the following:
Service Type
Service Name, Description, and Location
Cover Image and Gallery
Duration and Buffer Time
Price and Payment Preferences
Booking Policy
Booking Form
Booking and Payment Rules

How to Add a New Bookings Service
From the left hand menu on your site Dashboard, select Catalogue then Bookings Services
Select + Add a New Service from the top right of the page.
A new page will open where you can select a service template relevant to your industry, or start from scratch with a blank service.
Select + Start from Scratch to create a new service from a blank template by adding your chosen elements
or
Select a template with a pre-designed layout that you can customise to your industry and service.


The new service will open on a new page where you can enter or update the following:
Service Type
Service Name, Description, and Location
Cover Image and Gallery
Duration and Buffer Time
Price and Payment Preferences
Booking Policy
Booking Form
Booking and Payment Rules
How to Add a One-Time Class Session
First, add your bookings service from the Dashboard, then select the blue schedule or availability link under the Schedule Column on the Booking Services page.

A new page will open where you can select the date of your session.
Under the Repeat tab, select Weekly from the drop down and the day your session will occur from the week list.
Select Set an End Date and select a date that occurs one day after your one-time session. Then select Save.

*If you select 'Does Not Repeat' from the Repeat dropdown, your session will not show in the schedule and your clients will not be able to book this session from your Booking pages. You will need to ensure you add an end date to prevent your session from repeating for an indefinite number of weeks.
How to to Optimise Your Service Pages for SEO
From inside the service, select Edit SEO Settings from the Marketing and SEO side bar.
Select the Assistant tab, for a list of tasks to complete to optimise your service pages for search engines and social media.


*Alt text is a short description attached to your image that helps search engines like Google understand the image and lets screen readers read it aloud for visually impaired site visitors. Your alt text should be describe what's in your image, and include natural keywords (skip starting with "image of " or "picture of" just describe what the image shows).
*Meta descriptions are a snippet of text that appears beneath a webpage's title in search engine results pages, helping people understand what they will find when they click on your page.
How to Update Your Schedule and Availability
From the left hand menu on your site Dashboard, select Bookings Calendar then Calendar
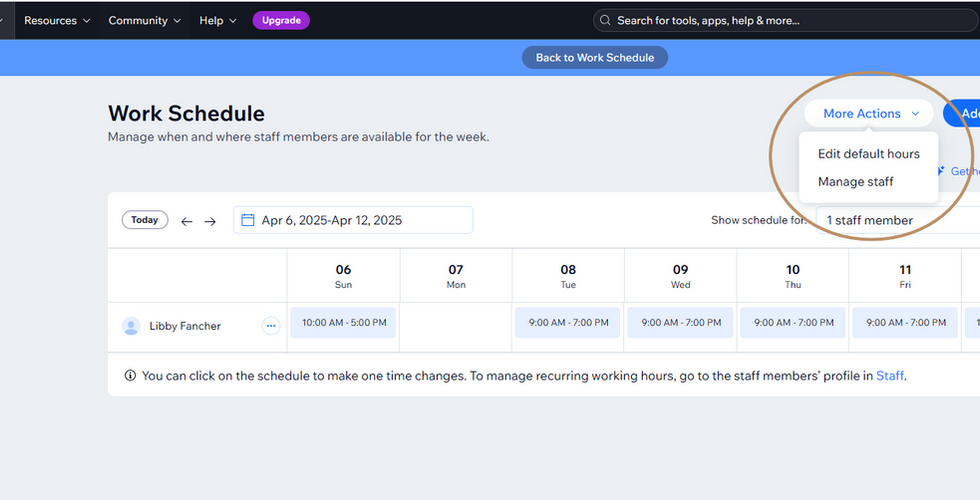
Update Your Availability
Select Manage from the top right to:
Update your default hours (if you are the only person working for your business your availability is determined by the default hours).
Update your work schedule (if you have multiple staff members and/or locations and want to update when and where staff members are available for the week).
Add New Dates and Times to a Booking Service
Select Add from the top right of the page to add a new:
Appointment (to add a client appointment for an existing service)
Class Session (to add a one off or repeating class session for an existing service) * see creating a one-time session for more info on one-off classes.
Course Session (to add a one off or repeating course session for an existing service)
Sync Your Calendar
Select the 3 Dot Menu at the top right of the page then select Sync Personal Calendar to Sync your personal calendar (to sync your Google, Apple, Office365, or Outlook calendar and avoid double booking).


How to Reschedule or Cancel an Appointment or Session
Rescheduling or Canceling Appointments
From the left hand menu on your site Dashboard, select Bookings Calendar then Calendar
Select the appointment you want to update then the 3 dot menu where you can update the following:
Cancel or reschedule the appointment
Collect payment for cancelled or rescheduled sessions.
Notify clients by email and/or SMS about the reschedule or cancellation.

Canceling a Class or Course Session
From the left hand menu on your site Dashboard, select Bookings Calendar then Calendar.
Select the appointment you want to update then Cancel Session where you can update the following:
Cancel this session.
Cancel all future repeating sessions.
Issue refunds.
Notify clients by email and/or SMS.
* For 'All future sessions', sessions that take place on other days and times have to be edited separately.

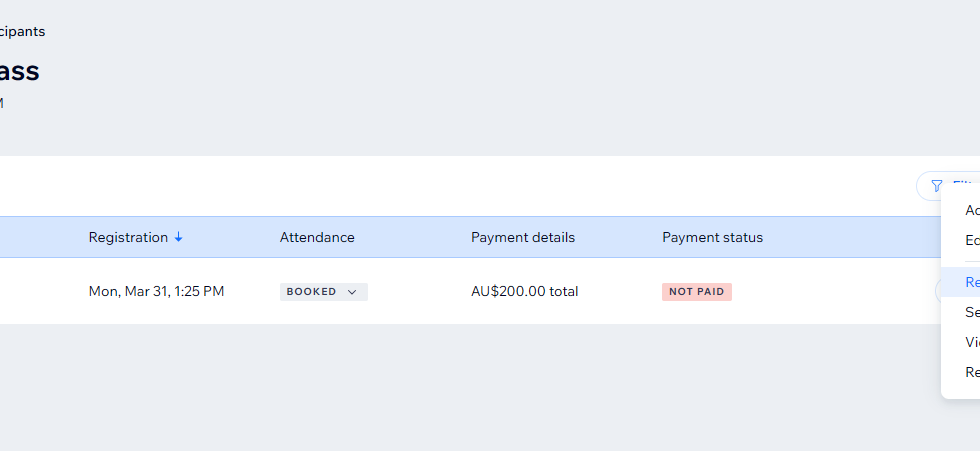
Removing a Participant from a Class or Course Session
From the left hand menu on your site Dashboard, select Bookings Calendar then Calendar.
Select the session the participant is attending then Manage.
Select the relevant participant on the Participant List then select the 3 dot menu to remove the participant from the session.


How to Update Automated Email Notifications
Switching Your Email Notifications On or Off
From the left hand menu on your site Dashboard, select Settings, then Bookings Settings, then Emails and SMS Notifications.
Scroll down to Emails You Get to toggle new booking emails on or off.

Updating Automated Customer Emails
*The following notifications are configured to automatically send to your customers via email:
Booking Confirmation (when a service booking is made on your site)
Booking Reminder (when a service booking is made on your site and is occuring in 1 days time)
Booking Cancellation (when either you or your client cancels a service booking)
Booking Reschedule (when either you or your client reschedules a service booking)
Booking Changes (when changes have been made to a bookings service appointment, session, or course)
From the left hand menu on your site Dashboard, select Settings, then Bookings Settings, then Emails and SMS Notifications.
Scroll down to select the notification you want to update and select Edit.

From inside the automation, Select Send an Email then from the side panel scroll down to Create an Email where you can update the following:
Edit the existing email template *You can only customise certain parts of the pre-installed email automations. This is to ensure uninterrupted delivery of important session information to your clients. The main image in your automated emails is the same as the image you select when creating a service.
Preview and test your updated template
Add or update an email attachment

Select Apply, from the top right of the page then Publish.
How to Create a Coupon Code
*Clients with a coupon code select the checkbox "I have a promo code" on the booking form, before going to checkout where they enter their discount code.
From the left hand menu on your site Dashboard, select Marketing then Coupons.
Select + New Coupon from the top right of the page.

Follow the prompts on screen to create a coupon with the below settings:
The discount amount and type ($ or %)
The coupon code for clients to use on your site
Which product the discount should apply to
The date the discount comes into effect and when it will expire (if applicable)
Whether the discount should be limited to a specific number of uses or limited to one use per customer.
You can promote your coupon using the 3 dot menu next to the relevant discount and selecting Email Campaign or Social Post.


How to Review Analytics and Reports
From the left hand menu on your site Dashboard, select Analytics, then Bookings Overview for an overview of bookings performance and insights on clients and any staff.
For detailed reports of different data relating to your online store and products, select Analytics, then All Reports from the Dashboard.
Need more information on managing your Wix Bookings app? Visit the Wix Help Centre.


Comments